How to Choose the Right Pneumatic Breaker?
Choosing the right Pneumatic Breaker is not simply a matter of selecting the largest model. The correct tool must match the material, working space, air supply, and expected workload. A breaker used on reinforced concrete faces different demands from one used on asphalt, brick, or compacted soil.
“Tool performance begins with the air system, not the tool itself,” says Michael Turner, an industrial pneumatic-equipment specialist with more than twenty years of field experience. His point is easy to overlook. A powerful breaker connected to an undersized compressor may strike weakly, overheat, or suffer premature wear. More power does not always mean better results.
Start with the job conditions. Measure the compressor’s actual airflow and pressure at the hose, not only the figures on its label. Check the breaker’s impact energy, operating weight, shank size, vibration control, and recommended hose diameter. A 30-kilogram model may break thick concrete quickly, but it can become exhausting during overhead work. A lighter unit may offer better control, even if each strike takes longer.
The working surface matters.
Maintenance also deserves attention. Clean, dry air protects internal components. Proper lubrication reduces friction around the piston and valve assembly. Ignoring these details is a common mistake. I have seen operators blame a breaker when the real problem was a blocked filter, a leaking coupling, or an air hose that was too long.
This guide explains how to compare Pneumatic Breaker specifications realistically. It also considers operator comfort, service access, noise, vibration, and long-term operating cost. The best choice is rarely the most impressive one. It is the model that performs reliably under your actual conditions.
Understanding Pneumatic Breaker Types and Their Applications
How to Choose the Right Pneumatic Breaker?
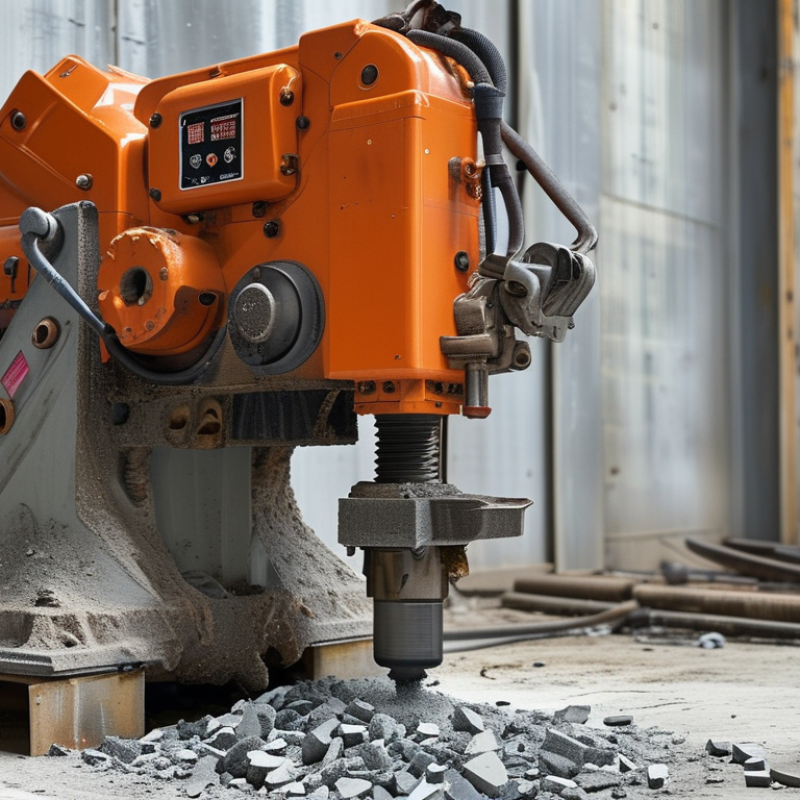
Pneumatic breakers convert compressed air into repeated hammer blows. Their design determines where they work best. Light chipping hammers suit tile removal, masonry trimming, and small concrete repairs. Medium pavement breakers handle sidewalks, asphalt patches, and shallow slab demolition. Heavy-duty breakers deliver stronger impact for thick concrete, stone, and demanding construction work.
The bit matters as much as the breaker. Use pointed bits for starting cracks and penetrating hard surfaces. Choose flat chisels for controlled splitting and edge work. Moil points can remove material quickly, but they may leave rougher surfaces. Match the breaker with the compressor’s working pressure and airflow. A weak air supply reduces impact force and causes uneven performance.
I have seen operators select tools by weight alone. That approach often fails. A heavy breaker can slow work when access is tight. A compact model may struggle against reinforced concrete. Check the material, working depth, operating position, and expected duty cycle. Vibration control also deserves attention during long shifts. Gloves help, but they do not remove the need for breaks and proper handling. Keep hoses secure and inspect couplings before use. Small mistakes become expensive.
Matching Breaker Power to Material and Work Requirements
Choosing the right pneumatic breaker starts with the material, not the machine’s size. Concrete, asphalt, brick, and compacted soil each resist impact differently. A breaker with excessive power may damage delicate surfaces or create unnecessary vibration. A weak breaker may bounce, overheat, and waste valuable work time.
For thick reinforced concrete, choose higher impact energy and a suitable tool diameter. Road repair often needs strong, repeated blows, while brick removal usually benefits from controlled power. Consider the carrier’s hydraulic or pneumatic capacity, too. Matching pressure, airflow, and operating weight prevents unstable performance. In field work, I have seen operators select power by appearance alone. That approach often fails. Material density, thickness, access, and daily workload matter more than impressive specifications. A small mistake here can become expensive.
Tips: Test the breaker on a limited area first. Watch penetration speed, vibration, and air consumption. Choose the lowest effective power for fragile surfaces. Inspect hoses, couplings, and tools before every shift. Allow cooling pauses during continuous work. Keep a record of actual performance, because published ratings may not reflect your site conditions. If the breaker struggles, reconsider the tool or technique before increasing pressure. More force is not always better.
Choosing the Right Chisel, Shank Size, and Air Supply
How to Choose the Right Pneumatic Breaker?
Choosing the Right Chisel, Shank Size, and Air Supply
The right pneumatic breaker begins with the material, not the tool’s appearance. Concrete, brick, asphalt, and compacted soil require different impact behavior. Use a moil point for deep penetration and narrow cracks. Choose a flat chisel for trimming edges or splitting slabs. A wide chisel can remove more surface material, but it may reduce impact concentration. Match the attachment to the task.
Shank size must match the breaker’s tool holder exactly. Measure the shank diameter, length, retaining groove, and collar shape. Even a small mismatch can cause movement, uneven wear, or a loose attachment. An undersized shank may damage the retainer. An oversized one will not seat correctly. In field maintenance, operators often check only the diameter. That is not enough. Inspect the locking mechanism before every shift.
Air supply controls real performance. Compare the breaker’s required pressure and air consumption with the compressor’s actual output. Do not rely only on the compressor’s maximum rating. A long, narrow hose can create pressure loss before air reaches the tool. Use a suitable hose diameter, secure couplings, and a clean filter. Test the breaker under load, not just while running freely. If the impact weakens after several seconds, the compressor may be too small, or the air line may be restricted. Even experienced users sometimes overlook that detail.
How to Choose the Right Pneumatic Breaker? - Choosing the Right Chisel, Shank Size, and Air Supply
| Application or Tool Class | Typical Tool Weight | Common Shank Size | Typical Air Consumption | Recommended Operating Pressure | Best-Suited Materials and Tasks |
|---|---|---|---|---|---|
| Light-duty chipping hammer | 3–7 kg | Hex 11 mm or 12.7 mm; round 10–14 mm | 10–20 cfm (0.28–0.57 m³/min) | 5.5–6.3 bar (80–90 psi) | Mortar removal, light concrete, brickwork, tile, and surface cleaning |
| Medium-duty breaker | 10–20 kg | Hex 19 mm or 22 mm; round 20–25 mm | 25–45 cfm (0.71–1.27 m³/min) | 5.5–6.3 bar (80–90 psi) | Concrete slabs, asphalt repair, masonry, and general demolition |
| Heavy-duty paving breaker | 20–30 kg | Hex 25 mm or 28 mm; round 25–32 mm | 40–70 cfm (1.13–1.98 m³/min) | 5.5–6.3 bar (80–90 psi) | Thick concrete, road surfaces, foundations, and hard masonry |
| Heavy-duty demolition breaker | 30–40 kg | Hex 28 mm or 32 mm; round 32 mm | 60–90 cfm (1.70–2.55 m³/min) | 5.5–6.3 bar (80–90 psi) | Reinforced concrete, thick foundations, bridge work, and major demolition |
Chisel Selection Guide
| Chisel Type | Primary Use | Typical Working Width or Point | Selection Considerations |
|---|---|---|---|
| Moil point | Penetrating hard concrete, stone, and compacted material | Pointed tip | Provides concentrated impact; less suitable for controlled surface removal |
| Point chisel | General breaking and starting holes in masonry or concrete | Pointed tip | Good general-purpose option; inspect regularly for mushrooming |
| Flat chisel | Cutting, scaling, trenching, and removing tiles or mortar | Approximately 20–50 mm blade width | Choose blade width according to the desired cutting control and material thickness |
| Clay spade | Digging or loosening clay, soil, and soft ground | Wide spade blade | Not intended for hard concrete; verify that the breaker is rated for digging accessories |
| Asphalt cutter | Straight cuts in asphalt and bituminous surfaces | Narrow, reinforced cutting blade | Use only with a compatible shank and avoid twisting the blade during operation |
Air Supply and Setup Requirements
| Check Point | Recommended Practice | Why It Matters |
|---|---|---|
| Compressor capacity | Select a compressor whose delivered air output meets the breaker requirement at the working pressure; allow approximately 25% reserve capacity | Prevents pressure drop and loss of impact energy during continuous use |
| Air hose | Use a hose with an internal diameter appropriate for the airflow; larger breakers commonly require 19 mm or 25 mm internal diameter hoses | A restricted hose increases pressure loss and reduces tool performance |
| Hose length | Keep the hose as short as practical and minimize unnecessary bends or restrictive fittings | Reduces friction losses and improves airflow stability |
| Air treatment | Install a filter and water separator; lubricate the tool according to the operating instructions | Removes moisture and contaminants that can accelerate internal wear |
| Operating pressure | Maintain the pressure specified for the tool, commonly about 5.5–6.3 bar (80–90 psi) | Excessive pressure may increase wear, while insufficient pressure reduces impact performance |
| Couplings and fittings | Use full-flow couplings and fittings that match the hose and tool inlet size | Small or incompatible fittings can become the main restriction in the air circuit |
Note: The figures shown are typical industry ranges. Always confirm the exact shank dimensions, airflow requirement, operating pressure, and accessory compatibility in the pneumatic breaker and chisel manufacturer's technical specifications.
Evaluating Ergonomics, Durability, Maintenance, and Safety
How to Choose the Right Pneumatic Breaker?
Evaluating Ergonomics, Durability, Maintenance, and Safety
Choosing a pneumatic breaker starts with the operator, not the impact rating. A tool that feels powerful may still cause rapid fatigue. Check its weight, grip diameter, trigger position, and vibration control. During a trial, hold it at working height for several minutes. Notice pressure in the wrists and shoulders. Small discomfort often becomes a serious problem after repeated use.
Durability depends on more than a hardened housing. Inspect the nose, retainer, air inlet, and hose connection. These parts face dust, impact, and constant movement. A breaker should withstand demanding work without becoming difficult to service. Ask for clear maintenance intervals and accessible replacement parts. Daily oiling, clean air, and secure hose fittings can prevent avoidable damage. In practice, maintenance is sometimes neglected when schedules become tight. That mistake is costly.
Tips: Match the breaker to the material and job duration. Use a properly sized compressor with stable air delivery. Fit hearing, eye, hand, and foot protection. Check the hose before every shift. Never lift or redirect the tool by its hose. Keep the work area clear of loose fragments. A short test can reveal more than a specification sheet. Listen for irregular exhaust sounds. Feel for unusual vibration. Stop when something seems wrong. Safety is not merely a checklist; it is a repeated decision under pressure.
Comparing Specifications, Operating Costs, and Overall Value
How to Choose the Right Pneumatic Breaker?
A pneumatic breaker should be judged beyond impact energy and blows per minute. Match its air demand with the compressor’s delivered flow, not the advertised capacity. The U.S. Department of Energy’s Improving Compressed Air System Performance sourcebook reports that leaks can waste 20–30% of compressor output in poorly maintained systems. That loss can make a powerful breaker feel weak on site. Measure pressure at the tool while it is striking. A long, narrow hose may quietly reduce performance.
Operating cost includes electricity, maintenance, hoses, couplings, and downtime. The U.S. Department of Energy also notes that compressed-air systems often use more energy than operators expect, especially when pressure is increased to solve poor flow. Every extra pressure adjustment deserves scrutiny. Compare air consumption at the same operating pressure, then estimate compressor hours per shift. A breaker using slightly more air may still deliver better value if it finishes concrete removal faster.
Weight and vibration matter just as much as impact force. ISO 28927-10 provides a recognized method for measuring hand-held pneumatic breaker vibration, but laboratory figures may not reflect broken pavement, cold gloves, or uneven footing. Check declared vibration values, service access, and operator feedback from similar jobs. I would also test two tools on the same slab before buying. Specifications can mislead. Real production time rarely does.

